
Putting up a road sign takes some careful steps. First, **pick the right Telespar post** to match the size of the sign. Use a powered post driver to push the post into the ground quickly. Attach the sign with rivets, making sure it faces traffic for clear visibility. Secure the post firmly, thinking about breakaway systems for safety. Install corner bolts so they face away from traffic to keep things stable. Check the anchor height to avoid collisions. The Telespar system offers strong support, easy swap-outs, and speedy setup. **Count on us** for a road sign assembly that’s safe and effective.
Key Takeaways
- Select the right Telespar post based on sign dimensions and weight
- Use a powered post driver for secure installation and reduced physical strain
- Attach the sign to the post using rivets for stability and easy replacement
- Insert the sign post with the correct anchor system for safety
- Install corner bolts facing away from traffic for stability and longevity

SmartSign – K-153-8M-2 U-Channel Sign Post, Medium Weight | 8' Tall Baked Enamel Steel Post – Pack of 2
PRE-DRILLED. U-channel sign posts have pre-drilled holes measuring 3/8” in diameter located at the top 30 inches of…
As an affiliate, we earn on qualifying purchases.
As an affiliate, we earn on qualifying purchases.
Selecting the Right Telespar Posts
When selecting the appropriate Telespar posts for your road sign installation, consider the specific size and strength requirements based on the sign dimensions and installation location. Telespar posts offer a variety of sizes and strengths to accommodate different sign sizes and installation locations. It's essential to choose the suitable Telespar post that can adequately support the weight and size of the road sign while ensuring stability and durability.
Telespar posts come in both in-ground and insert options, providing versatility for different soil types and installation preferences. Constructed of high-quality galvanized steel, Telespar posts are designed for durability and long-lasting performance, ensuring that your road sign remains securely in place for years to come. Additionally, these posts are compatible with a range of anchor systems, allowing for customization to meet specific installation requirements.
Widely used in the industry for their reliability, ease of installation, and compatibility with breakaway systems, Telespar posts are a popular choice for road sign installations. By choosing the right Telespar posts, you can guarantee a sturdy and secure foundation for your road sign.

Gtongoko 8LB Fence Post Driver with Handles Heavy Duty T Post Driver Post Pounder for T-Posts, U Channel, Metal Post and Sign Post Pole Driver Tool, Black
【DURABLE & HIGH QUALITY MATERIAL】The fence post driver is made of durable steel with premium, corrosion-resistant powder coating…
As an affiliate, we earn on qualifying purchases.
As an affiliate, we earn on qualifying purchases.
Using a Powered Post Driver

To properly use a powered post driver, we need to focus on three key points:
- Powering the driver: Make sure the driver is powered and ready for operation before starting.
- Positioning the sign: Position the sign where it needs to be installed, ensuring it's in the correct location.
- Driving the post: Carefully drive the post into the ground using the powered post driver, ensuring it's secure and aligned correctly for the best support.
Powering the Driver
Using a powered post driver guarantees efficient and reliable installation of sign post anchors, minimizing physical strain and ensuring stability. Here are key points to take into account when powering the driver:
- Choose the appropriate power option based on soil type and anchor size.
- Make sure the powered post driver provides consistent impact force for proper installation depth.
- Save time and effort by quickly driving posts into the ground with reduced physical strain.
- Achieve a secure foundation for road signs, reducing the risk of posts shifting or falling.
Positioning the Sign
Opting for a powered post driver streamlines the process of positioning road signs securely and efficiently. This tool helps impact the anchor into the soil, ensuring a stable installation.
When positioning the sign, always face it in the direction of traffic for visibility and safety. Make sure the anchor protrudes at least 2 inches above ground level to maintain stability. Double-checking the anchor's height and the installation of corner bolts is important for a secure placement.
Using a powered post driver can greatly reduce installation time, making the process more efficient and cost-effective. By following these steps diligently, you can make sure that the road sign is positioned correctly and securely for the safety of all road users.
Driving the Post
Let's power up the post driver and get ready to drive the anchor into the soil for a secure installation. When using a powered post driver for your road sign project, follow these key steps for best results:
- Efficiency: The powered post driver allows for quick and easy impact, saving time and effort during installation.
- Protrusion: Make sure the anchor protrudes 2 inches above ground, staying within the FHWA recommended maximum of 4 inches.
- Depth: Drive the anchor a minimum of 26 inches into the ground to guarantee stability and durability.
- Foundation: Using the powered post driver ensures a solid foundation, reducing the risk of sign post damage or instability.
Mastering the use of the powered post driver is important for a safe and long-lasting road sign installation.

Tandefio 16 Pcs 304 Stainless Steel U Channel Sign Post Attachment Kit Mounting Hardware Road Sign Hardware 2-3/4" and 1-1/2" Mounting Screws Bolts and Nuts for Accessories
Quantity Availability: our generous packaging includes 16 sets of sign mounting hardware, offering you a satisfying abundance of…
As an affiliate, we earn on qualifying purchases.
As an affiliate, we earn on qualifying purchases.
Attaching the Sign to the Post

To securely attach the sign to the Telespar post, we recommend using rivets for durability and stability. Before attaching the sign, make sure that it faces the correct direction of traffic flow. Rivets create a strong connection between the sign and the post, preventing it from coming loose due to environmental factors or vibrations. This method also allows for easy replacement if the sign gets damaged or worn over time.
Rivets are a reliable and long-lasting solution for securing road signs to Telespar posts, guaranteeing effective visibility and safety for drivers. By using rivets, you can be confident that the sign will remain securely in place, even during harsh weather conditions or heavy winds. This method is commonly used in road sign installation due to its proven track record of maintaining sign integrity over extended periods.
When attaching the sign to the post with rivets, make sure to fasten them securely according to the manufacturer's guidelines to ensure top performance and longevity.
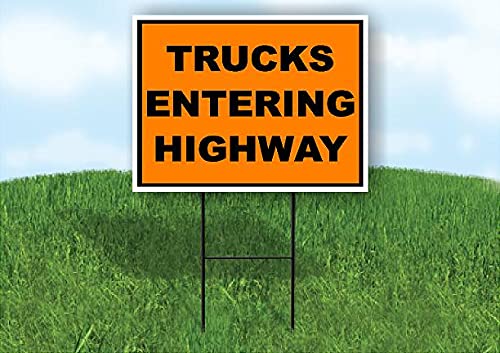
Trucks Entering Highway – Double Sided Yard Sign ROAD SIGN with Stand
Double sided plastic yard sign that measures 18"x24"
As an affiliate, we earn on qualifying purchases.
As an affiliate, we earn on qualifying purchases.
Inserting the Sign Post

For proper installation of the road sign, we recommend utilizing the Telespar system's anchor systems to securely insert the sign post into the ground. Here are some key steps to follow:
- Choose the Right Anchor: Select the appropriate anchor system based on your installation needs, such as single breakaway, heavy-duty, or omni-directional anchors.
- Drive the Anchor In: Drive the anchor at least 26 inches into the ground using a powered post driver. Make sure that there's a recommended protrusion of 2 inches above the soil for stability.
- Attach the Sign: Once the anchor is securely in place, attach the sign to the post using rivets. Be certain that the sign is properly oriented with the corner bolt facing away from oncoming traffic for safety.
- Consider Breakaway Systems: Opting for Telespar's breakaway system can enhance safety by minimizing damage in case of impact, ultimately reducing labor costs and installation time.
Installing Corner Bolts

After securely attaching the sign to the Telespar post using rivets, the next step involves installing the corner bolts to ensure stability and durability. Corner bolts are important components that secure the sign firmly to the post, ensuring it stays in place even during adverse weather conditions.
When installing corner bolts, it's important to position them facing away from oncoming traffic to prevent any safety hazards. These bolts play a significant role in maintaining the sign's integrity, especially in high-traffic areas where the sign may face constant stress.
Properly installed corner bolts not only enhance the sign's stability but also contribute to its longevity and overall effectiveness. Regularly checking the installation of corner bolts is necessary to verify the safety and functionality of the road sign setup.
Double-Checking Anchor Height

Ensuring the anchor height meets the recommended standards is essential for the stability and safety of the road sign. Double-checking the anchor height before finalizing the installation process is an important step. Here are four key points to keep in mind:
- Minimum Depth: The anchor should be inserted a minimum of 26 inches into the ground. This depth provides the necessary stability to withstand external forces and environmental conditions.
- Maximum Protrusion: The Federal Highway Administration (FHWA) recommends a maximum anchor protrusion of 4 inches above ground level. This limit helps prevent any hazards to passing vehicles or pedestrians.
- Breakaway System Effectiveness: Proper anchor height is crucial for the effectiveness of the breakaway system. It allows the sign to detach safely upon impact, reducing the risk of severe damage or injury.
- Risk Mitigation: Correct anchor height minimizes the risk of damage in the event of a collision. By adhering to the recommended standards, you enhance the safety and longevity of the road sign.
Exploring Telespar System Benefits

Exploring the anchor height guarantees the stability and safety of the road sign; now, let's examine the advantages of the Telespar system.
The Telespar system boasts a breakaway design that minimizes damage and enhances safety in case of impact, making it a reliable choice for sign support. One key benefit is the ease of replacing damaged Telespar posts, reducing maintenance costs and minimizing downtime on the road. Additionally, these posts can be reused after minor damage, providing a cost-effective solution for sign support systems.
The quick and efficient installation process of the Telespar system not only saves on labor costs but also ensures timely placement of road signs, contributing to overall road safety. As a trusted market leader, Telespar is well-known for its durability and reliability on the road, giving users peace of mind regarding the longevity and effectiveness of their sign support system.
Frequently Asked Questions
How Do I Install a Sign?
To install a sign, we utilize a powered post driver to firmly secure the anchor in the ground. The anchor should protrude 2-4 inches above the ground, in accordance with FHWA guidelines.
We affix the sign to the telespar post with rivets for a sturdy connection. For safety measures, position the corner bolts away from oncoming traffic.
Double-check the anchor and bolts' placement and height to guarantee the sign is securely in place.
How Do You Install a Road Sign Post?
To install a road sign post, first, select a Telespar post and anchor system for easy maintenance. Drive the anchor at least 26 inches into the ground for stability. Attach the sign securely using rivets. Face the sign towards traffic flow and make sure corner bolts face away from oncoming vehicles.
Benefit from the safety features and cost-effectiveness of the Telespar system. Follow these steps for a successful road sign installation.
How Street Signs Are Put Together?
When putting together street signs, we attach the sign to a Telespar post using rivets for durability. Telespar posts come in different types for various installation needs.
Anchoring systems vary based on location and impact requirements, with options like single breakaway, heavy-duty, or slip base systems available. The process involves driving the anchor into the ground, ensuring it protrudes at least 2 inches above ground level.
It's all about making sure the sign stays secure and visible for everyone's safety.
How Are Signs Put Into the Ground?
When signs are put into the ground, we utilize durable Telespar posts and various anchor systems such as single breakaway, heavy-duty, and slip base options.
Anchors are driven into the ground leaving a 2-inch protrusion, and signs are securely attached using rivets. Ensuring proper sign placement involves checking anchor height and orientation with corner bolts facing away from traffic for safety.
Telespar systems offer quick installation, easy post replacement, and cost savings.
What Are the Essential Steps for Putting Up Road Signs?
When putting up road signs, the essential stepbystep road sign measurement involves determining the correct location and height for the sign. It is crucial to ensure that the sign is visible to drivers and meets any local regulations. Proper measurements can prevent accidents and enhance overall road safety.
Conclusion
To sum up, when erecting a road sign, it's crucial to:
- Choose the right Telespar posts
- Utilize a powered post driver
- Secure the sign properly
- Place the post accurately
- Fasten corner bolts
- Double-check anchor height
By following these steps, you can guarantee a safe and efficient installation process. Remember, attention to detail and proper technique are essential for a successful road sign display.
Happy road sign installing!